As someone who has been using OBS Studio for screen recording for the past 7 years, I’ve learned a thing or two about how to optimize it for the best possible recording quality. With the latest 2024 release of OBS Studio, there are even more options and customizations you can make to ensure your screen recordings turn out flawlessly. Let’s read below about “How to Set Up OBS Studio 2024 for Optimal Screen Recording Quality’.
In this post, I’ll walk you through my best tips for setting up OBS Studio for screen recording like a pro. Whether you’re recording tutorials, gameplay, presentations or anything else from your screen, these settings will help you create professional, high-quality videos.
Table of Contents
How to Set Up OBS Studio 2024 for Optimal Screen Recording Quality
Get the Latest Version of OBS Studio
First things first – make sure you have the latest 2024 version of OBS Studio installed. As an open source software, OBS is constantly being updated with new features and optimizations. The 2024 release includes improved NVIDIA NVENC encoding, multi-track audio mixing and enhanced plugins support.
Downloading the latest version ensures you have access to all the newest tools for customizing your recording setup. You can download OBS Studio 2024 for free from the official website.
Choose Your Video Settings Wisely
One of the most important things to configure is your base video settings in OBS Studio. This includes your canvas resolution, output resolution, frames per second (FPS) and bitrate.
I recommend setting your canvas to match your monitor’s native resolution. For output, 1080p or 1440p are good choices. Match your FPS to your monitor’s refresh rate (usually 60FPS or 144FPS). You can leave bitrate on “Automatic” in most cases.
I’ve found these settings give the best balance between quality and file size. Make sure to choose settings your computer’s hardware can handle smoothly. Recording in 4K may not be necessary and will create huge files.
Set Up Your Audio Sources Properly
Audio quality is just as crucial as video quality for professional screen recordings. Take time to set up your microphone and any other audio sources in OBS correctly.
Use a dedicated USB microphone if possible, positioned close to your mouth and set to “Cardioid” mode. Add it as an audio source in OBS. Then go to the Filters menu and add Noise Suppression, Gain and Compressor filters to optimize the sound.
For system audio, create an Audio Output Capture source to record game sound, music or anything playing on your PC. Adjust audio levels until your voice and system audio are nicely balanced.
Optimize Your Encoder Settings
OBS has multiple video encoder options, with x264 and NVENC being the most popular. I recommend NVENC if you have an NVIDIA GPU as it utilizes dedicated GPU encoding for better performance.
Read More:- Key Features of OBS Studio 2024 for Live Streaming Explained
In the Output section, set your Encoder to NVENC. Make sure your Rate Control is set to CBR and look up the optimal bitrate for your resolution and FPS target. This will ensure consistent quality.
I also enable the “Enforce Streaming Service Encoder Settings” option when recording, as it optimizes NVENC for recording instead of live streaming.
Use a High-Quality Recording Format
OBS supports various recording formats, but some are better than others. I always use MKV as my recording format, with the H.264 video codec and AAC audio codec.
MKV files are lossless quality and support higher resolutions and FPS. H.264 provides great quality at reasonable file sizes. AAC handles audio nicely.
You can remux or convert the MKV files to MP4 or other formats later if needed. But for the initial recording, MKV H.264 AAC gives fantastic results every time.

Customize Your Scene Layout
OBS scenes and sources allow you to precisely control what’s captured in your recording. Set up your scenes to match what you want to record.
For gameplay, have one scene for the fullscreen game and another for your webcam overlay. For software tutorials, create one scene for the app window and another for slides/graphics.
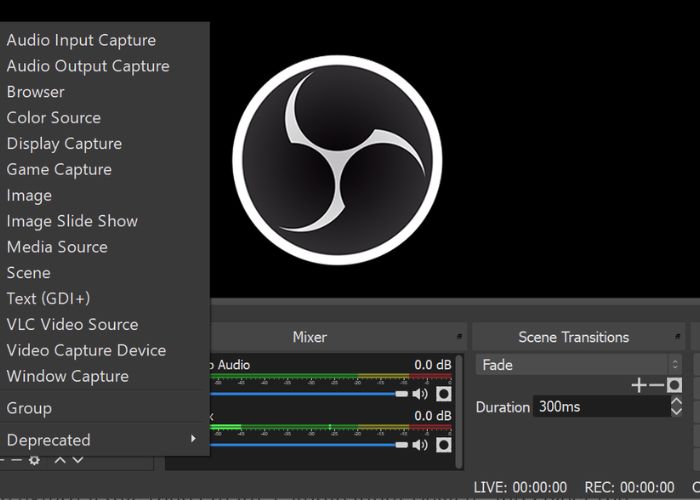
Use additional sources like images, text, window/game captures and your webcam to build up custom, professional scene layouts. Make sure to position, resize and crop sources for optimal framing.
Improve Performance With Optimizations
To avoid lag, stuttering and dropped frames while recording, you need to optimize OBS performance. One of the biggest tips is to enable “Process Priority” > “Above Normal” or “High” in Settings > Advanced.
Also disable sources you don’t need, reduce FPS, close other programs and disable Aero/transparency in Windows. Using the NVENC encoder also reduces load on your CPU for smoother recording.
Test and Tweak Your Settings
The best way to dial in your OBS setup is to test it extensively. Record short test clips of your screen and playback the footage. Check for any errors, lag, poor video quality or audio issues.
Make incremental tweaks to your settings and run more tests. For example, try increasing the bitrate if quality is lacking or reducing it if the files are too large.
Keep running test recordings until you have flawlessly optimized OBS studio for your specific recording needs. Don’t be afraid to experiment with different settings combinations.
Use Hotkeys for Recording Controls
Once your OBS settings are perfected, set up hotkeys to control recording, streaming and scene switching. This allows you to easily start/stop recordings and change scenes without fumbling with the interface.
I configure hotkeys like F9 to start/stop recording, F10 to start/stop streaming and F1-F8 to switch between different scenes. Hotkeys make recording sessions and live streams flow smoothly.
According to youtube, With the right settings dialed in and hotkeys configured, you’ll be able to record high-quality screen footage with OBS Studio 2024 like a professional. It takes some tweaking to get things just right, but the effort is well worth it.
The tips above cover the essential settings I’ve found produce the best results. Follow this advice and your OBS Studio recordings will turn out perfectly crisp, clear and optimized for any purpose.
Conclusion
I hope this guide helps you get set up with the ideal OBS Studio settings for your screen recording needs. Let me know if you have any other questions! I’m always happy to help fellow screen recording enthusiasts get the most out of this fantastic free software. I hope you like reading “How to Set Up OBS Studio 2024 for Optimal Screen Recording Quality’.

Mirza is a skilled Videographer, Editor, and Photographer with over 5 years of experience in digital media. Holding a degree in Computer Science, Mirza brings a wealth of expertise in screen recording and video production to screenrecorder.in. His deep understanding of visual storytelling and technical proficiency ensures that readers receive reliable, authoritative advice on the latest screen recording tools and techniques. Follow Mirza on Instagram for insights into his creative process and tech updates.
